What Does “Site Migration” Actually Mean?
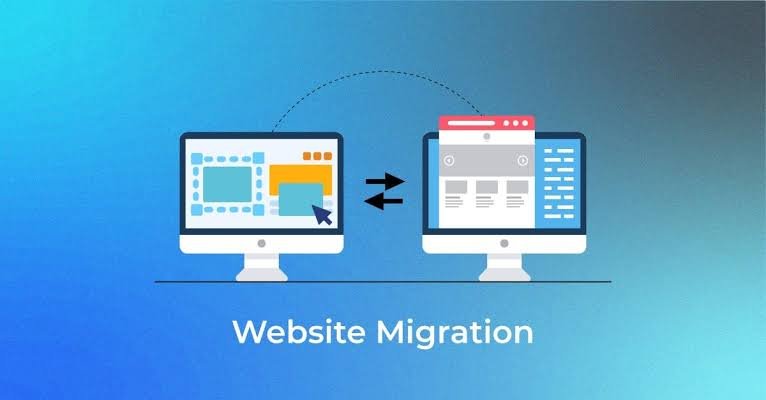
A site migration is the process of moving your website’s files, database, and settings from one hosting provider to another without breaking the site or losing data. Done right, visitors never notice it happened. Done wrong, you get a broken checkout page on Black Friday or a 404 error where your homepage used to be.
I’ve handled dozens of these moves for client sites over the years, and the ones that go badly almost always skip the same step: testing before switching. People get excited about the new hosting — maybe it’s cheaper, maybe it’s faster — and they rush the DNS switch before confirming the new server actually works.
That’s the whole game with site migration. It’s not really about moving files. It’s about sequencing things so the switch itself is invisible.
Why Downtime Happens During a Site Migration (And Why It’s Avoidable)
Downtime during a migration almost never happens because the new host is bad. It happens because of timing mistakes.
Here’s a real scenario: a small ecommerce store selling handmade candles decided to switch from Bluehost to SiteGround for better speed. The owner pointed the domain’s DNS to the new server before uploading the WooCommerce database. For six hours, customers landed on a blank WordPress install with no products, no cart, nothing. Orders that would’ve gone through that afternoon just… didn’t happen.
That’s the pattern behind almost every bad migration:
- DNS gets updated before the new server is ready
- The database gets migrated but files don’t match versions
- SSL certificates aren’t set up on the new host yet
- Email (MX records) get overlooked and mail bounces for days
None of this is complicated to avoid. It just requires doing things in the right order, which is what the rest of this guide covers.
Also Read: Easy Tips to Make Your Website Faster and Easier to Use.
Before You Touch Anything: Pre-Migration Checklist
Before you start any site migration, get these basics sorted:
- Know your current stack. PHP version, database type (MySQL vs MariaDB), server OS. Mismatches here cause weird bugs later.
- List every subdomain and app connected to the domain — staging sites, mail servers, API endpoints, anything on a subdomain.
- Check your current uptime and traffic patterns. If your site gets most traffic between 9 a.m. and 5 p.m. EST, don’t migrate at noon.
- Confirm your new hosting plan can actually handle your traffic. A site doing 50,000 monthly visitors shouldn’t land on a $3/month shared plan.
- Save your current DNS records somewhere safe — screenshot them or export a zone file. You’ll need this as a reference.
Pick a low-traffic window for the actual cutover. Tuesday at 3 a.m. in your primary audience’s time zone is usually safer than Monday morning.
Also Read: Content Promotion Services to Increase Brand Visibility.
How to Move a Site to New Hosting Step by Step
This is the core migration guide — the actual sequence that keeps a site live the entire time.
Step 1 – Back Up Everything (Twice)
Take a full backup of your current site: files, database, and configuration. Store one copy on your computer and one somewhere else — Google Drive, Dropbox, an external drive. Don’t rely on your old host’s backup system alone, especially if you’re about to cancel that account.
For a WordPress site, this means the wp-content folder, the wp-config.php file, and a full SQL export of the database. Tools like UpdraftPlus or All-in-One WP Migration handle this in a few clicks.
Step 2 – Set Up the New Hosting Environment First
Don’t cancel or touch your old hosting yet. Get the new server ready first — same PHP version, same or newer MySQL version, SSL certificate installed, and any required software (Node, Redis, whatever your stack needs).
Most managed hosts like Kinsta or WP Engine will actually match your PHP version automatically during setup. Budget hosts often don’t, so check manually.
Step 3 – Transfer Files and Databases
Upload your website files via SFTP (FileZilla is the standard free tool) and import your database through phpMyAdmin or a command-line MySQL import. For larger sites — anything over 5-10 GB — a direct server-to-server transfer using SSH and rsync is faster and more reliable than uploading through a browser.
If you’re using a CMS like WordPress, update the wp-config.php file with the new database name, username, and password. Miss this step and you’ll get the classic “Error establishing a database connection” message.
Also Read: Website Maintenance and Performance Improvement Plans.
Step 4 – Test the Site on the New Server Before Switching
This is the step most guides gloss over, and it’s the one that prevents almost all downtime.
Every hosting provider gives you a temporary URL or lets you edit your local hosts file to preview the site on the new server before DNS points there. On a Mac or Windows machine, editing the hosts file takes two minutes and lets you view the live site exactly as visitors will see it — but only on your device.
Check these specific things:
- Homepage and at least 5 internal pages load correctly
- Contact forms actually submit and send email
- Checkout/payment flow works if it’s an ecommerce site
- Images and CSS load (broken paths are a common issue after migration)
- Admin login works with correct credentials
Step 5 – Lower Your DNS TTL Early
TTL (Time to Live) controls how long DNS records get cached by browsers and ISPs. If your TTL is set to 24 hours and you switch hosts, some visitors could keep hitting the old server for a full day after the move.
At least 24-48 hours before migrating, log into your DNS provider (Cloudflare, GoDaddy, Namecheap, whatever you use) and drop the TTL down to 300 seconds (5 minutes). This alone eliminates most of the downtime people associate with site migration.
Step 6 – Update DNS Records
Once testing on Step 4 passes and TTL is lowered, update your A record to point to the new server’s IP address. If you’re using Cloudflare as a proxy, update the origin IP there instead.
Don’t forget MX records if your email is hosted separately from your website — Google Workspace or Microsoft 365 users especially need to double-check this, since email routing is a different set of records entirely from your website’s A record.
Also Read: Paid Ad Management to Grow Targeted Website Leads Fast.
Step 7 – Monitor Both Servers During Propagation
For the next few hours, keep both the old and new hosting active. DNS propagation isn’t instant — even with a low TTL, some DNS resolvers cache longer than they should.
Use a tool like whatsmydns.net to check propagation status across different global locations. You’ll typically see it spread to 80-90% of servers within 1-2 hours when TTL is set low, and fully settle within 24 hours.
Step 8 – Confirm Everything Post-Migration
Once propagation looks complete:
- Test the live domain (not the temp URL) from multiple devices and networks
- Check Google Search Console for crawl errors
- Verify SSL is active (look for the padlock, no “not secure” warnings)
- Test form submissions and any payment gateways again on the live domain
- Keep the old hosting account active for 7-14 days as a safety net before canceling
How Long Does DNS Propagation Actually Take?
DNS propagation typically takes anywhere from a few minutes to 48 hours, depending on TTL settings and how various ISPs cache records. With a properly lowered TTL, most visitors see the new server within 1-4 hours.
Here’s a rough comparison based on TTL settings:
| TTL Setting | Typical Propagation Time |
|---|---|
| 300 seconds (5 min) | 1-4 hours for full propagation |
| 3,600 seconds (1 hour) | 4-12 hours |
| 86,400 seconds (24 hours) | Up to 48 hours |
This is exactly why Step 5 matters so much. Skipping the TTL adjustment is probably the single most common reason a migration guide says “wait 24-48 hours” — because most people never lower it in advance.
Also Read: Responsive Website Builds Focused on Speed and SEO.
Common Migration Mistakes That Cause Downtime
A few mistakes show up over and over in failed migrations:
- Switching DNS before testing. The new server might have a typo in the database credentials nobody caught.
- Forgetting MX records. Website moves fine, but email stops working for days.
- Ignoring PHP/MySQL version mismatches. A site built on PHP 7.4 can throw fatal errors on a server running PHP 8.2 without code updates.
- Not updating hardcoded URLs. If the old site has
http://URLs hardcoded instead ofhttps://, or the domain is hardcoded with “www” and the new setup doesn’t match, you get mixed content warnings or broken links. - Canceling old hosting too soon. Wait at least a week. If something breaks on the new host, you want a fallback.
- Not telling anyone. If you run an agency site or a business with a support team, tell them the migration date so they’re not blindsided by a “site down” ticket that’s actually just propagation.
Do You Need a Migration Plugin or Service?
For WordPress sites, a migration plugin usually makes sense — it handles file transfer and database updates automatically and reduces human error. For anything custom-built (a Laravel app, a Node.js site, a static site with a headless CMS), manual migration or a DevOps-assisted move is usually safer.
Quick comparison of common options:
| Method | Best For | Approx. Cost |
|---|---|---|
| Manual (SFTP + phpMyAdmin) | Small sites, full control | Free |
| WordPress plugin (Duplicator, All-in-One WP Migration) | WordPress sites under 500MB | Free–$69/year |
| Host-assisted migration | Non-technical users | Free (many hosts offer this) |
| Managed migration service | Large or complex sites | $150–$500 one-time |
Worth noting: many hosts, including Kinsta, WP Engine, and SiteGround, offer free migration as part of onboarding. If you’re paying for a premium host, ask before doing it yourself — you might save a weekend.
Also Read: Local SEO Services to Boost Nearby Customer Traffic.
How to Tell If Your Migration Was Successful
Check these signals in the days after your move:
- Uptime monitoring shows no gaps. Tools like UptimeRobot (free tier available) can log this automatically if set up before the switch.
- Google Search Console shows no spike in crawl errors in the week following migration.
- Page load speed matches or improves compared to the old host — check with GTmetrix or PageSpeed Insights.
- Organic traffic holds steady in Google Analytics; a sudden 20%+ drop usually points to a technical issue, not an algorithm change.
- No support tickets or customer complaints about broken pages or failed checkouts.
If all five hold up for about two weeks, the migration worked.
FAQ
Q: How long does a typical site migration take?
A: For a small to mid-sized site, the actual file and database transfer takes 1-3 hours. Add DNS propagation time (1-24 hours depending on TTL settings), and the full process from start to finish usually wraps up within a day.
Q: Can I migrate a site without any downtime at all?
A: Yes, if you set up and fully test the new server before switching DNS, and lower your TTL in advance. Most downtime comes from switching DNS too early, not from the migration process itself.
Q: Will site migration hurt my SEO rankings?
A: Not if the domain stays the same and you’re just changing hosting providers (not changing URLs). Google doesn’t care where your server lives — it cares whether the site loads fast and consistently, which a good migration actually improves.
Q: What’s the difference between migrating hosting and migrating to a new domain?
A: Migrating hosting means moving your files and database to a different server while keeping the same domain name. Migrating domains means changing the URL itself, which requires 301 redirects and carries a much higher SEO risk.
Q: Do I need to hire someone to migrate my site, or can I do it myself?
A: Simple WordPress sites under 1GB can usually be migrated with a plugin in under an hour by anyone comfortable following instructions. Larger or custom-built sites — especially ecommerce stores with live transactions — are worth paying a developer $150-$300 to handle, since mistakes there cost more than the fee.
Q: What happens to my email during a hosting migration?
A: If your email runs through a separate provider like Google Workspace, it’s unaffected as long as you don’t touch the MX records. If email is hosted on the same server as your website, you’ll need to migrate it separately and update MX records carefully to avoid a mail outage.
Also Read: Technical SEO Fixes for Faster Site Indexing and Crawling.
Conclusion
The single biggest thing that separates a smooth site migration from a disaster is sequence: set up and test the new server fully before you ever touch DNS. Everything else — backups, TTL settings, checking MX records — exists to support that one rule. Get that part right, and moving to new hosting becomes routine instead of risky.
For more useful articles, visit my website: HighSoftware99.